

The Subaru Ascent is equipped with multiple tether anchor points (typically five or six, depending on configuration), allowing safe and reliable installation of child restraint systems with top tether straps. These tether anchorages in the Subaru Ascent are designed to provide an additional point of attachment, improving stability and significantly reducing forward movement of the child seat during sudden braking or collisions.
When installing a child restraint system in the Subaru Ascent using a tether, always follow the detailed instructions provided by the child restraint manufacturer. Correct use of the tether system ensures maximum effectiveness of the restraint system and enhances overall passenger safety.
Because a tether provides an extra securing point between the child restraint system and the Subaru Ascent vehicle structure, it is strongly recommended to use it whenever available or required.
Anchorage location
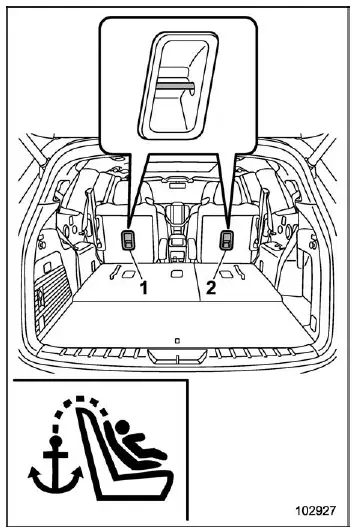
Second-row seat (captain seat)
- For left seat
- For right seat
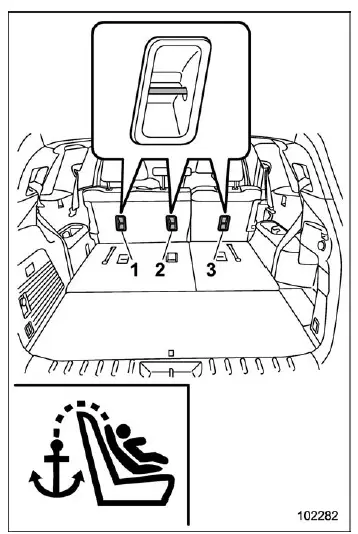
Second-row seat (bench seat)
- For left seat
- For center seat
- For right seat
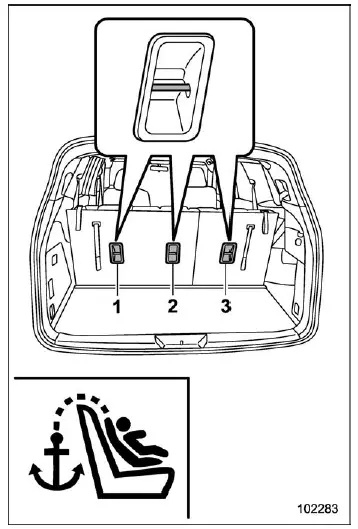
Third-row seat
- For left seat
- For center seat
- For right seat
In the Subaru Ascent, three tether anchor points are typically located on the rear side of the seatbacks, providing dedicated attachment locations for child restraint systems.
To hook the tether
CAUTION
When installing a child restraint system with a tether in the Subaru Ascent, always raise the head restraint to its extended position. Failure to do so may prevent the tether strap from being tightened properly, reducing its effectiveness.
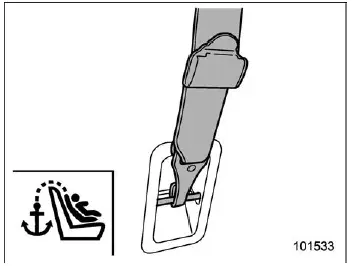
1. Attach the tether hook to the appropriate anchor point located behind the seat in the Subaru Ascent.
2. Pull the tether strap firmly to remove slack and ensure a tight, secure connection.
For maximum safety, Subaru recommends having the installation checked by a certified Child Passenger Safety Technician. In the United States, refer to the National Highway Traffic Safety Administration (NHTSA) website to locate inspection centers. In Canada, consult Transport Canada resources.
Related manual topics
Windshield washer fluid
When the windshield washer fluid level in your Subaru Ascent becomes low, the
dedicated warning indicator will illuminate on the instrument panel. This alert
signals that the washer fluid reservoir requires immediate attention to maintain
clear visibility while driving.
As soon as this wa ...
Handling of radar sensors
Sensors
In the Subaru Ascent, radar sensors are strategically positioned on both sides
of the rear bumper to monitor adjacent traffic and support BSD/RCTA functionality.
To maintain reliable and accurate operation of the Subaru Ascent BSD/RCTA system,
the following precautions must al ...