

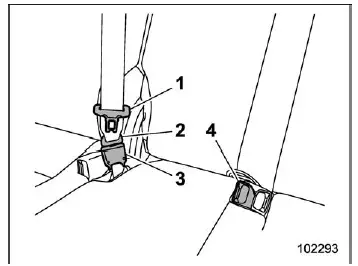
- Center seatbelt tongue plate
- Anchor tongue plate
- Anchor buckle
- Center seatbelt buckle
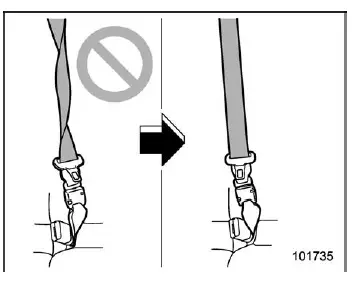
WARNING
In the Subaru Ascent, fastening a seatbelt with twisted webbing can significantly increase the risk and severity of injuries during a collision.
When pulling the seatbelt from the retractor and connecting the anchor tongue plate to the corresponding buckle on the right-hand side, always verify that the webbing is flat and not twisted.
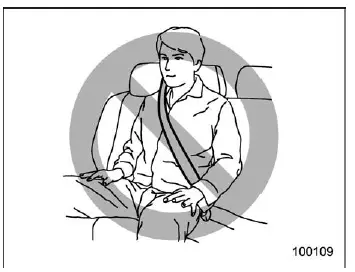
WARNING
- Always secure both tongue plates of the Subaru Ascent center seatbelt
into their corresponding buckles.
If only the shoulder portion is used without connecting the anchor tongue plate, the seatbelt will not properly restrain the occupant, which may result in serious injury or death.
- The head restraint must never be used in its lowest position in the Subaru
Ascent.
Before sitting, always raise the head restraint to the extended position to provide adequate support and reduce injury risk in an accident.
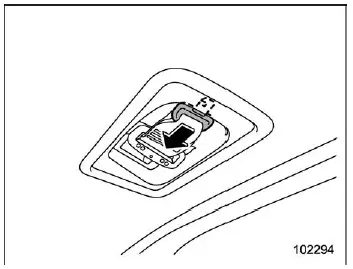
The Subaru Ascent third-row center seatbelt is neatly stored in a ceiling-mounted compartment when not in use.
1. Pull the anchor tongue plate out from the ceiling slot by drawing it toward the rear.
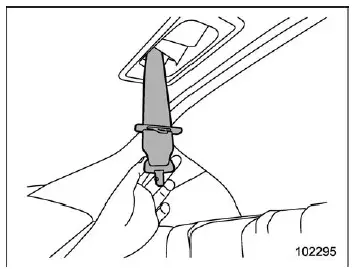
2. Slowly extend the seatbelt from the overhead retractor.
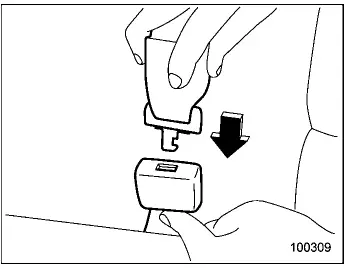
3. After confirming the webbing is not twisted, insert the anchor tongue plate into the right-hand buckle until a click is heard.
- If the belt stops before reaching the buckle, allow slight retraction and pull it out again slowly.
- If necessary, apply a firm pull and then gradually extend the belt again.
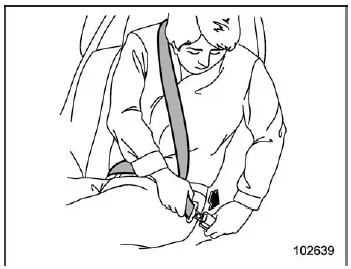
4. Insert the center tongue plate into the buckle labeled "CENTER" on the left-hand side until it clicks securely.
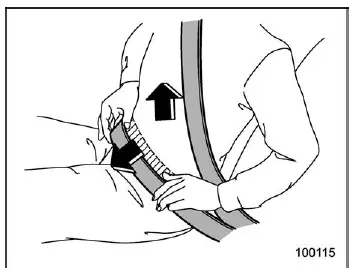
5. Tighten the lap portion by pulling upward on the shoulder belt.
6. Position the lap belt low across the hips, not across the waist, to ensure maximum protection in the Subaru Ascent.
Seatbelt comfort guide
The Subaru Ascent is equipped with a seatbelt comfort guide to help position the shoulder belt more comfortably for passengers.
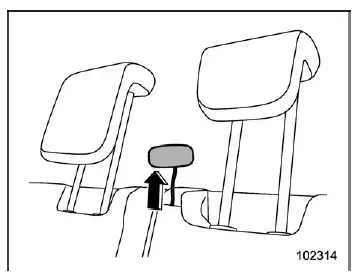
1. Remove the comfort guide from the shoulder pocket.
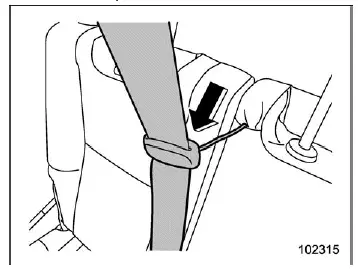
2. Thread the seatbelt through the guide slot, ensuring the elastic cord remains behind the belt.
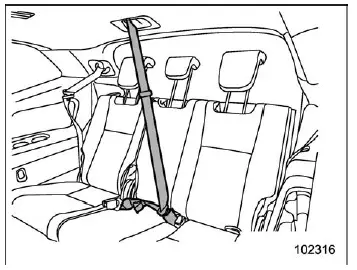
3. Fasten the seatbelt and adjust it for a comfortable and secure fit.
Unfastening the seatbelt
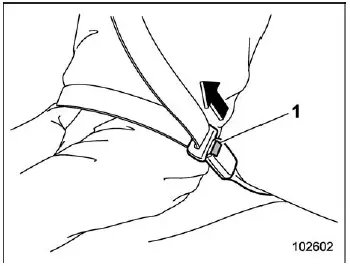
- Button
1. Press the release button on the center buckle to unfasten the seatbelt.
NOTE
When folding the seatback in the Subaru Ascent, it is necessary to disconnect the seatbelt connector.
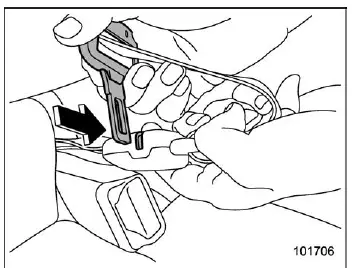
2. Insert a tongue plate or similar object into the slot of the anchor buckle on the right-hand side to release the anchor tongue plate.
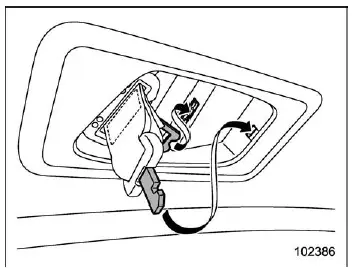
3. Hold the belt and allow it to retract slowly into the ceiling mechanism. Guide it carefully to prevent twisting and store both tongue plates neatly in their designated slots.
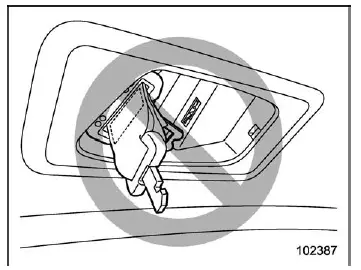
CAUTION
- Do not allow the Subaru Ascent seatbelt to retract too quickly, as the metal tongue plates may strike interior trim and cause damage.
- Ensure the seatbelt is fully retracted and properly stored. Loose or hanging components may swing and damage the interior during driving.
Seatbelt maintenance
To maintain the seatbelts in the Subaru Ascent, clean them using mild soap and lukewarm water. Avoid using bleach or dyes, as these substances can weaken the belt material and compromise safety.
Regularly inspect all seatbelt components, including webbing, buckles, and mounting hardware, for signs of wear such as cuts, fraying, or looseness. Replace any damaged seatbelt components immediately, even if the damage appears minor.
CAUTION
- Keep Subaru Ascent seatbelts free from oils, chemicals, and especially battery acid, as these substances can degrade the material.
- Never modify or alter the seatbelt system in the Subaru Ascent, as this may prevent it from functioning correctly and reduce occupant safety.
The advanced seatbelt system in the Subaru Ascent is engineered to deliver maximum protection when used correctly, ensuring safety for all passengers across every seating position.
Related manual topics
Engine hood
CAUTION
Exercise extreme caution when closing the engine hood of your Subaru
Ascent to avoid trapping fingers or other objects, which may lead to injury.
Do not apply excessive force when closing the hood. Forcing it down may
deform the metal structure and affect proper alignment.
Be e ...
Parking tips
When parking your Subaru Ascent, it is essential to follow proper procedures
to ensure maximum safety and prevent unintended vehicle movement. Always complete
the following actions before leaving the vehicle.
Firmly engage the parking brake to secure the Subaru Ascent.
Shift the select lev ...